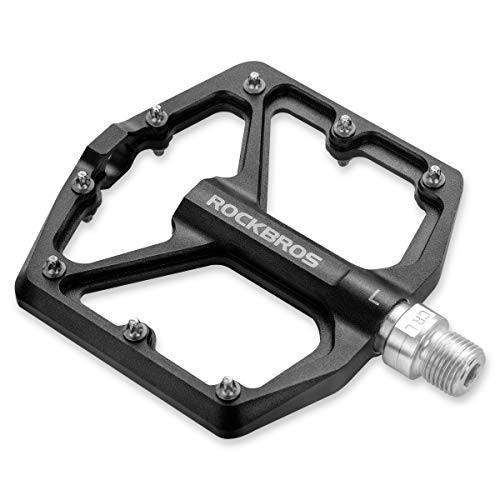
Cleat position decides where your foot sits on the pedal and at what angle, so it affects comfort every time you ride. This guide follows Park Tool’s instructions for positioning and replacing cleats, with REI’s advice on learning to clip in and out.
Why Cleat Setup Matters
Park Tool says the rotation angle is very important for rider comfort, performance and health, because a foot position that is off stresses the joint connections of the knee, hip and or ankle. Park Tool’s guide on pedal retention systems explains that the shoe is really the beginning of the bicycle drive train, and a sloppy fitting shoe will be as inefficient as loose bearings. Clipless pedals, which use a cleat on the sole to lock into the pedal, keep your foot secure during the power stroke so you can transfer energy more effectively. REI recommends clipless pedals if you want more efficiency and control. (Park Tool adds that pulling all the way around the pedal stroke is a common myth; the benefit is that the foot stays secure during the power stroke.) If you are still deciding between pedal types, our clipless vs flat pedals guide breaks down the trade-offs.
Understanding Cleat Systems and Float
Cleats come in two main patterns. Road cycling shoes typically use a three-hole design (Look, Time or SPD-SL styles) with a large plastic cleat that protrudes from the sole, spreading pedaling force over a wide area for a secure connection. Mountain bike and city cycling shoes use a two-hole recessed cleat (SPD, crankbrothers or Time styles) that sits flush with the sole, making walking easier. REI’s shoe guide describes these differences in detail, and our road cycling shoes guide and mountain bike shoes guide can help you choose the right footwear.
Many clipless systems offer float, which is the amount of angular rotation the cleat allows before releasing. Park Tool’s article states that float lets the foot rotate slightly so the leg joints are not locked, but excessive float can make bike handling less precise. REI’s pedal article adds that different cleats provide different degrees of float, and some systems hold the foot at a fixed angle. You can often change the cleat to vary the float, which becomes a personal preference as you gain experience.
Cleat Adjustment Options
Park Tool’s guide outlines three primary adjustments you can make to your cleats. The table below summarizes what each adjustment changes, based on their instructions.
| Adjustment | What It Changes |
|---|---|
| Fore-aft position | Moving the cleat forward places the foot closer to the pedal spindle, suiting riders who prefer a higher cadence with lower gears. Sliding the cleat backward places more of the foot forward relative to the spindle, which suits a slower cadence and larger gear ratio (Park Tool). |
| Rotation | Allows the shoe to rotate clockwise or counter-clockwise to match the natural gait, similar to the angle of wet footprints on cement. An incorrect angle can stress the knee, hip or ankle (Park Tool). |
| Lateral / medial position | Moves the shoe inward or outward independently of rotation. If the heel strikes the crank, Park Tool advises moving the shoe laterally outward rather than rotating it. |
Recording Your Current Settings
If you are replacing worn cleats and want to keep the same feel, Park Tool suggests two methods. For road cleats, use a marker to trace the outline of the old cleat on the sole before removing it. For off-road cleats, which are recessed and harder to outline, measure the fore-aft distance from the front of the shoe to a fixed point on the cleat, and the lateral distance from the side of the shoe to a fixed point. To capture rotation, clip the shoe into the pedal, push it close to the crank and measure from the crank face to a fixed point on the shoe. Write down these numbers so you can duplicate the setting with new cleats. Park Tool’s tool guide also recommends recording the cleat type (such as SPD or Crank Brothers) and whether it is a float or non-float model, along with the tools needed for your pedals, which may have a 15 mm wrench flat or a 6 mm or 8 mm hex fitting. Our repair and maintenance gear page can help you assemble the right tools.
Replacing Worn Cleats
Cleats wear out with use. REI’s shoe advice says to replace them if they become difficult to release, or if they start to release with little effort or inadvertently. Park Tool notes that off-road cleat bolts often fill with mud and debris; clean the screw head with a seal pick or a ground spoke before trying to remove them. When installing new cleats, treat the bolt threads with a thread locker, grease or an anti-seize compound. Park Tool states that anti-seize resists water, mud and dirt better than grease. Use your recorded measurements or outline to position the new cleat, then tighten the bolts securely.
Practicing Clipping In and Out
Learning to use clipless pedals takes practice. REI’s pedal article recommends finding a level, grassy field to soften any falls. To clip in, apply the front brake, clip in one shoe, start rolling and then clip in the second pedal once you have balance. To unclip, think “heel out” and twist your ankle outward before you come to a complete stop. REI suggests repeating the motion 50 to 60 times per pedal to build muscle memory. You can also practice on a bike trainer or have a friend hold the handlebars. Multiple-release cleats, which are typically sold separately, release at slightly increased angles and can be more forgiving for beginners, according to REI.
Care and Maintenance
If clipping in or out becomes difficult, REI advises cleaning the pedals with warm water to remove mud and debris, and checking for obvious damage. For off-road cleats, keep the bolt heads free of packed dirt so a hex wrench can fully engage. Park Tool recommends treating cleat bolt threads during installation, noting that anti-seize resists water, mud and dirt much better than grease.
While you focus on cleat setup, remember that bike laws for lights, helmets and e-bike classes vary by state and city. Check local regulations and our guides on helmets and bike lights to stay compliant.
Frequently asked questions
How do I know when to replace my cleats?
REI’s shoe guide says to replace cleats if they become difficult to release, release with little effort or release inadvertently. Regular visual checks for wear are also a good idea. Worth reading next: 10 Best Cycling Glasses Heads Up Display Options for Road and Trail Riders.
What is cleat float and do I need it?
Float is the amount of angular rotation the cleat allows before releasing. Park Tool explains that float prevents the leg joints from being locked, but excessive float can make handling less precise. REI notes that different cleats offer different degrees of float, and it is largely a personal preference.
How can I practice using clipless pedals without falling?
REI suggests practicing on a grassy field, clipping in and out 50 to 60 times per pedal to build muscle memory. You can also use a bike trainer or have a friend hold the handlebars while you repeat the motion.
For more gear guides, visit our Shoes & Pedals category page.