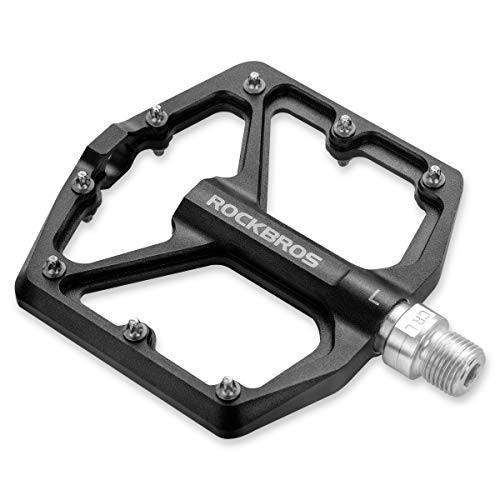
Pedals decide how your feet connect to the bike: free on a platform, held by a toe clip, or locked in with a cleat. This guide compares flat and clipless pedals and explains cleat systems, float and setup, using REI’s pedal and shoe advice and Park Tool’s guides to pedal retention and pedal installation.
How Pedal Retention Works
Pedal retention systems keep your feet connected to the pedals so you can transfer power more smoothly. According to Park Tool’s repair guide, a sloppy fitting shoe is as inefficient as loose bearings, and without a retention system your feet can fly off the pedal during hard efforts. The guide also notes a common myth: toe clips and clipless pedals do not let you pull up on the backstroke with meaningful force. Instead, they help by keeping the foot secure during the power stroke.
REI’s expert advice explains that clipless pedals work by mounting a small plastic or metal cleat on the sole of your shoe. That cleat snaps into spring-loaded clips on the pedal face. The name “clipless” is a holdover from decades ago, when these systems replaced cage-like toe clips and straps. Park Tool describes toe clips as a simple, traditional method that can be used with most recreational shoes. A mini toe clip has no strap and lets the foot exit to the side or back. A full toe clip with a strap adds significantly more security.
Clipless vs Flat Pedals: Key Trade-Offs
REI frames the choice simply: pick clipless pedals if you want more efficiency and control, with your shoes connected to the pedals. (REI describes power transfer on both the push and the pull, while Park Tool calls pulling up on the backstroke a common myth; both agree retention helps keep the foot secure.) Choose flat pedals if you need to take your feet off quickly or want to walk comfortably in shoes that do not have cleats. Park Tool adds that riding with any foot retention device requires some skill development, and REI recommends practicing clipping in and out 50 to 60 times to build muscle memory.
Flat pedals provide a stable, wider surface and work with nearly any shoe. REI notes that many downhill mountain bikers prefer flat pedals paired with grippy-soled shoes because this combination is the easiest to get off of in a crash. Commuters and recreational riders who get on and off the bike frequently may also prefer flats so they can wear more walkable shoes.
Road Pedals and Three-Bolt Cleats
Road cycling pedals typically use a three-hole cleat pattern, which REI calls a “Look” type or SPD-SL system. The cleat is larger, made of plastic, and protrudes farther from the sole than a two-bolt cleat. REI explains that the larger cleat spreads pedaling force over a wider area, reducing pressure on the connection points during high stress loads. Park Tool describes the road shoe as very efficient for cycling but not designed for walking.
Park Tool’s guide walks through cleat setup in detail. The cleat can be moved forward, backward, rotated, and slid left to right. The fore-aft position moves the foot relative to the pedal spindle. Park Tool uses the joint of the big toe as a reference point: a cleat set close to the spindle suits a rider who prefers a higher cadence with lower gears, while a cleat slid back places more of the foot forward and suits a slower cadence with bigger gears.
Mountain and Recreational Pedals and Two-Bolt Cleats
Off-road clipless systems use a two-hole cleat that is recessed into the sole. Park Tool notes that the shoe sole tends to be softer rubber and flexes for walking. REI adds that the two-bolt design lets you slide the cleat back and forth slightly in the shoe’s tracks to dial in angle and placement. Mountain bikers may choose clipless for more pedal efficiency, better bike control, or climbing power. Riders who are learning or want to freely take a foot off may prefer flat platform pedals.
Recreational cyclists and commuters often gravitate toward two-bolt systems or flat pedals. REI says that a two-hole cleat system makes it easier to walk around in compatible shoes, and city cycling shoes resemble sneakers with recessed cleats. Hybrid pedals offer platform on one side and a clipless mechanism on the other, which REI describes as an excellent transition option for riders who do not always wear a cycling shoe.
Cleat Float, Release and Wear
Float is the amount of angular rotation the pedal allows before the cleat releases. Park Tool explains that some clipless systems are designed to float so the leg joints are not locked, which makes cleat alignment less critical in theory. However, the guide warns that excessive float can make bike handling less precise. REI notes that different cleats allow different degrees of float, and a few systems hold the foot at a fixed angle while others let you customize the range.
REI describes multiple-release cleats as a variant that releases a bit more easily and at slightly increased angles: the heel can move outward, inward, or slightly upward. These are typically sold separately from pedals and may feel more forgiving than standard lateral-release cleats.
Cleats wear out with use. Park Tool recommends marking the old cleat outline with a marker on road shoes before removing it, so the new cleat can be placed to match. For off-road shoes, where outlining is harder, Park Tool suggests measuring fore-aft from the front of the shoe to a fixed point on the cleat, lateral distance from the side of the shoe, and rotational position by measuring from the crank face to a fixed point on the shoe while the cleat is engaged in the pedal. REI adds that you should replace cleats if they become difficult to release, release with little effort, or cause clipping-out issues you did not have before.
Cleat Setup and Foot Alignment
Park Tool stresses that cleat rotation is important for comfort, performance, and joint health. If the foot position is off, it can stress the knee, hip, or ankle. The guide suggests setting rotation to simulate your natural walking gait, similar to the angle your wet feet leave on cement. It also distinguishes between rotation and lateral adjustment: if your heel strikes the crank but the rotation feels right, move the shoe laterally outward instead of rotating it.
Pedals are designed to sit level, but the human foot may not work well in that flat position. Park Tool says there is typically no cleat adjustment for this, so the shoe must be fitted with an insole. For bolt preparation, the guide recommends treating cleat bolt threads with grease or an anti-seize compound to resist water, mud, and dirt.
Pedal Installation and Thread Direction
Park Tool’s pedal wrench instructions cover removal and installation. Before removing a pedal, shift the chain to the largest chainring to protect your hands from sharp teeth. The right pedal removes by turning counter-clockwise; the left pedal removes by turning clockwise. For installation, apply grease to the threads of both pedals. The right pedal, marked “R,” threads clockwise into the right crank. The left pedal, marked “L,” threads counter-clockwise into the left crank. Both should be started by hand and then tightened with a pedal wrench.
Pedal and Shoe Care
REI’s pedal guide says that if engaging or disengaging becomes difficult, the pedal may need cleaning and lubrication. Look for obvious damage first, then scrub the pedal with warm water to remove mud and debris. Let it dry and add a drop of light lube to the clips on both sides if the pedal is dual-sided. An old toothbrush works well if you do not have a brush kit. For wet shoes, REI recommends a boot dryer that uses warm, gentle airflow, or packing the shoes with newspaper overnight and replacing the paper after a few hours if they are very wet.
Bike laws covering lights, helmets, and e-bike classes vary by state and city. Before you commit to a pedal system for commuting or urban riding, check your local requirements. Our helmets guide and bike lights guide can help you understand what gear may be required where you ride.
| Pedal Type | How It Works | Suits |
|---|---|---|
| Flat (platform) | Wide surface with no retention mechanism; works with nearly any shoe. Grippy-soled flat shoes add traction. | Downhill mountain biking, commuting, recreational riding, riders who want quick foot removal |
| Toe clip and strap | Cage-like frame and strap attached to a platform pedal; foot exits to the side or back. Can be used with recreational shoes. | Riders who want some retention without switching to cleated shoes |
| Clipless road (three-bolt) | Large plastic cleat protrudes from a stiff, smooth sole; snaps into a spring-loaded pedal mechanism. Spreads force over a wide area. | Road cyclists seeking maximum pedaling efficiency and power transfer |
| Clipless mountain/touring (two-bolt) | Small metal cleat recessed into a grippy, walkable sole; engages a compact pedal mechanism. Cleat slides in shoe tracks for adjustment. | Mountain biking, touring, commuting, recreational riders who want efficiency plus walkability |
| Hybrid (dual-sided) | One side is a clipless mechanism, the other side is a flat platform. Lets you ride clipped in or with regular shoes. | Riders transitioning to clipless, or those who mix clipped-in rides with casual use |
If you are still deciding between shoe and pedal styles, our shoes and pedals category page can help you browse related guides. For a deeper look at cleat positioning, see how to set up cycling cleats. Riders who prefer flat pedals can explore the flat pedal guide, and those riding trails should check the mountain bike shoes guide for clipless and flat options. Road cyclists can find more detail in the road cycling shoes guide.
Frequently asked questions
Do I need special shoes for clipless pedals?
Yes. REI explains that clipless pedals, cleats, and shoes must work as a system. Road pedals use a three-bolt cleat on a stiff, smooth-soled shoe. Mountain and city pedals use a two-bolt cleat on a shoe with a recessed cleat pocket and a grippy or walkable sole. Flat pedals do not require special shoes, but flat-specific mountain bike shoes with sticky rubber can improve grip.
How do I know when to replace my cleats?
REI advises replacing cleats if they become difficult to release, release with very little effort, or cause unexpected clipping-out problems. Park Tool adds that cleats wear out with use and recommends recording the position of your old cleats before swapping them so you can duplicate the setup.
Why do left and right pedals tighten in opposite directions?
According to Park Tool’s pedal wrench instructions, the right pedal is marked “R” and tightens clockwise, while the left pedal is marked “L” and tightens counter-clockwise. Always apply grease to the threads before installation and start each pedal by hand.
Ready to look at the full range of footwear and pedal options? Visit our shoes and pedals category.