 By Logan Fleming
Oakley Jawbreaker cycling glasses are one of the most recognized sport frames on the road and trail. This guide walks you through what the Jawbreaker is built for, how to check fit and lens choice, and how to decide whether the frame suits your riding. By the end, you should be able to pick a pair with confidence and avoid the most common purchasing mistakes.
What the Oakley Jawbreaker Is Built For
The Jawbreaker is a wraparound performance frame with a bold, high-coverage shape. Oakley positions it for road, gravel and general outdoor sport, and the design leans toward wide field of view and stability at speed. If you want a glasses option that you can compare directly against other Oakley road lines, it helps to read Oakley Glasses for Cycling (2026): Which Should You Choose? first, since it lays out how the different Oakley frames divide up by riding style.
Because the Jawbreaker has a larger lens footprint than many slim road frames, it tends to suit riders who spend long hours in the drops and want more coverage from wind, grit and low sun. Riders with smaller faces or narrow heads may find it sits differently, so fit deserves as much attention as the lens color.
Step 1: Check Fit Before You Look at Lenses
A glasses frame that slides, pinches or sits too high will affect your riding far more than a lens tint will. Work through fit first.
- Measure your head width. Use a soft tape around the widest part of your head, just above the ears. Compare this to the frame’s temple-to-temple listing and the lens width printed on the inside of the temple arm.
- Check the nose bridge. The bridge should rest on your nose without pressing hard. Gaps of more than a few millimeters at the nose often let air and grit in, which is a common complaint among riders who buy frames that are too wide.
- Test the temple grip. The arms should hold the frame securely without digging into the sides of your head. Shake your head gently in a mirror. The frame should stay put.
- Look at the helmet fit. Put on your helmet with the glasses. The temples should not push the helmet forward or lift the brim, and the frame should sit inside the helmet’s vent line rather than blocking it.
- Confirm the nose pad setup. Many Oakley frames use adjustable or swappable nose pads. Set them so the frame rests evenly, with no pressure points at the top of your nose.
Fit Checklist
- Frame stays put during head shakes and a short jog
- No pressure marks on the nose or behind the ears after 20 minutes
- Lenses cover the full eye area without touching your lashes
- Helmet sits level with the glasses in place
- Nose pads adjust evenly on both sides
Step 2: Choose the Right Lens for Your Conditions
Lens choice affects contrast, glare and comfort more than most riders expect. Oakley’s lens system uses different tints, and manufacturers generally describe them by light transmission and intended use. Use the table below as a starting point, then match it to the riding you do most.
| Lens Type | Typical Use | Best Conditions | Trade-off |
|---|---|---|---|
| Dark gray or black | Bright sun, open roads | High light, glare-heavy days | Dims shadows and can feel dark under trees |
| Prizm-style or contrast-enhancing tints | Mixed terrain, changing light | Trail and road riding with shade | Colors can look stronger than neutral lenses |
| Yellow or amber | Low light, overcast | Dawn, dusk, dim tunnels | Not suitable for bright sun |
| Clear | Night or indoor use | Night rides, trainer sessions | No sun or glare protection |
If your riding crosses light levels, a single dark lens may leave you squinting at dusk. Many riders keep a second lens or a second pair. For a broader look at low-light options, see 8 Best Clear Cycling Glasses for Low Light and Night Riding and 9 Best Cycling Glasses Yellow Lenses for Low-Light Riding.
Step 3: Decide Whether You Need Prescription Lenses
If you wear corrective lenses, you have two main routes: a full prescription frame or a clip-in or insert system. Full prescription frames are fitted to your exact prescription, but they cost more time and limit your choice of frame. Inserts let you keep the Jawbreaker’s fit and lens options, but the insert must sit correctly behind the lens to avoid distortion.
For a side-by-side comparison of these two approaches, read Prescription Sports Glasses Cycling vs Clip-On Inserts: Which Should You Choose?. If you go the insert route, Prescription Insert Cycling Glasses: How to Get Them Right covers measurements and what to ask your optician.
Prescription eyewear is a health-related purchase. Have an eye care professional confirm your prescription and fitting before you order, especially if you have astigmatism, progressive lenses or a history of eye strain.
Step 4: Check Coverage and Ventilation
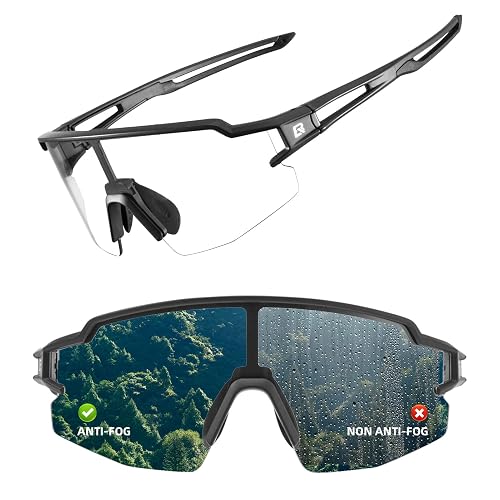
The Jawbreaker’s coverage is one of its strengths, but coverage also affects fogging. A larger lens traps more humid air around the eyes on hard climbs. Look for vents at the top and sides of the frame, and make sure they are not blocked by your helmet straps or sweatband. Riders who fog up often find that a light anti-fog treatment or a quick wipe with a microfiber cloth before the ride makes a clear difference. You can compare treatments in 7 Best Cycling Glasses Anti Fogs for Road and Trail Riders (2026).
Step 5: Set Up Peripheral Vision and Mirrors
Wraparound frames narrow your view of the rear unless you use a mirror. If you ride in traffic, plan your mirror setup before the first ride. Position the mirror on your helmet or handlebar so you can check traffic with a small glance, not a head turn. Our guide to 7 Best Cycling Mirrors for Glasses for Road and Trail Riders (2026) covers mounting styles and how they interact with eyewear.
Step 6: Test the Pair on a Short Ride
Do not judge a pair on a shop floor. Ride a loop of 30 to 45 minutes that includes climbing, descending, and a stretch of direct sun or shade if possible. During the ride, pay attention to pressure points, slipping on sweat, and whether you keep reaching up to adjust. Check the lenses for distortion when you look down at your stem and handlebar. If the frame still feels right after 30 minutes, it is likely a good fit for longer rides.
Recommended gear
A few accessories make the Jawbreaker more practical for daily riding. Start with a hard case, since the lenses scratch easily if they rub against keys or tools. A microfiber cloth and a lens cleaner keep the coating intact and prevent smearing. If you plan to add a second lens for changing light, a spare lens kit lets you swap without buying a new frame.
- Oakley Jawbreaker replacement lenses: A second lens set matched to the frame lets you adapt to light changes without buying another pair. View on Amazon
- Hard protective eyewear case: A rigid case keeps lenses from scratching in a jersey pocket or bag. View on Amazon
- Microfiber lens cloth set: Soft, lint-free cloths clean lenses without leaving streaks or scratches. View on Amazon
- Anti-fog lens spray: A treatment spray reduces fogging on humid or cold rides when vents alone are not enough. View on Amazon
Common Mistakes
- Buying by lens color alone. A tint that looks good in a store may be too dark for your usual riding light or too pale for midday sun.
- Ignoring the nose bridge. A gap at the nose is a common cause of wind leakage and tearing.
- Skipping the helmet test. Glasses that fit alone can still push against the helmet brim or block vents once you ride.
- Cleaning with a shirt or paper towel. Cloth fibers and paper leave micro-scratches that build up over time.
- Assuming prescription inserts work the same as frame lenses. Insert fit and placement affect clarity, so confirm the setup with your provider.
Tips
- Store the glasses in a case, lenses up, and never leave them on a dashboard in heat.
- Rinse off sweat and salt after rides to protect the lens coating and nose pads.
- Keep a second lens or pair for variable conditions, especially if you ride from morning to dusk.
- Replace nose pads when they harden or lose grip rather than waiting for a visible break.
FAQ
Are Oakley Jawbreaker cycling glasses good for road riding?
Yes, many road riders use the Jawbreaker for its wide coverage and stable fit. Check fit and helmet compatibility before you decide, since the frame’s size can feel different from slimmer road models.
Can I get prescription lenses for the Jawbreaker?
Prescription options depend on the model and region. Many riders use prescription inserts that fit behind the frame lens. Confirm the setup with an eye care professional before ordering.
Which lens color is best for the Jawbreaker?
A dark or contrast-enhancing lens suits bright sun and open roads, while a yellow or clear lens works better for low light. Many riders own two lens types to cover changing conditions.
How do I stop the Jawbreaker from fogging?
Use the frame’s vents, avoid blocking them with your helmet straps, and apply an anti-fog treatment or wipe with a treated cloth before riding. Fogging is often worse on hard climbs and cold mornings.
Do the glasses fit under a cycling helmet?
Most riders can use them with a standard road or trail helmet, but test the fit with your own helmet. The temples should not lift the brim or interfere with the straps.
How should I clean the lenses?
Rinse with water first, then dry with a microfiber cloth. Avoid paper towels, shirts and harsh chemicals, which can damage coatings over time.
Can I use the Jawbreaker for night riding?
A dark tinted lens is not suitable for night riding. Use a clear or light yellow lens for low light, and check the lens guidance for your specific model.
Conclusion
Choosing oakley jawbreaker cycling glasses comes down to fit, lens match and how you plan to ride. Start with the frame and helmet fit, then select a lens for your typical light and decide early whether you need prescription support. A short test ride will confirm the choice, and a small set of accessories will keep the lenses clear and protected.
Ready to choose one?

About Logan Fleming
Logan puts together our cycling apparel & tech guides, digging through specifications, manufacturer details and owner reviews so you don't have to.





Write Your Review
No reviews yet. Be the first to share your experience!